MEM (Intune) PKCS Certificates End to End
So let's start by talking about certificates! These have been around an extremely long time and are not a new concept in most enterprises today. In the past we would use services Like ADCS to deploy certs to AD joined Devices, and NDES (Network Device Enrollment Service) to deploy Certificate to Device not directly enrolled into AD. For a great blog on NDES and how to deploy check out Jeff Gilberts Blog Link. For the sake of simplicity and modernization I'm going to cover how to deploy certificates in Intune using the relatively new PKCS connector.
NDES is a nightmare to deploy I mean ADCS (Active Directory Certificate Services) is bulky enough to deploy and maintain now adding an additional service NDES on top which has some very strict operating parameters which if not near perfect will leave your deployment taking days or weeks when in today's world we anticipate minutes or hours.
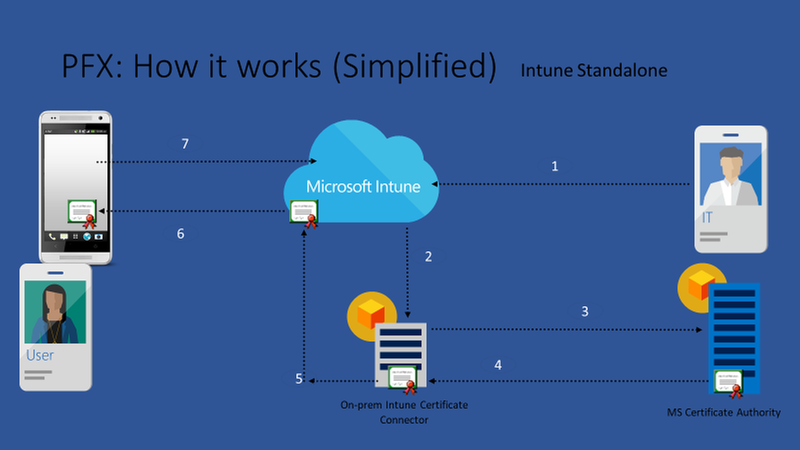
So this brings us to the Intune PKCS (private key Certificate Service) Certificate connector. The Intune team has taken the complexity of NDES and simplified it down to a simple connector which acts as the broker between Intune and your on-premise ADCS environment.
In this guide I will walk you through how to deploy PKCS, I have done this dozens of times with customers and in a fraction of the time it would take us to deploy NDES. There still are ADCS requirements as we are still leveraging your on-premise ADCS for authentication, but that’s the whole point of certificate trust.
Prep ADCS and a Certificate Template:
So let's head on-prem and log into your ADCS server or a member server with the CA (Certificate Authority) tools loaded.
Now the first thing we will need to do is add the member server where we plan to deploy our Intune PKCS connector, and grant the computer object the ability to issue and request certificates. This is because we will be using the system account on the computer to broker the relationship, you do have the option to use a services account for this, but I have found the computer account is more efficient.
Open Certificate Authority, right click the server name and go to properties, find the security tab and click Add.

Select computer object and provide the computer account for your member server, and OK.
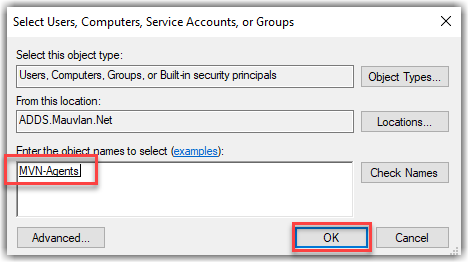
Be sure to select Issues and Manage Certificates how its shown below, and Apply.

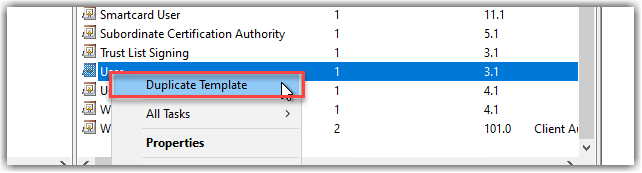
Now let's head over and build are certificate template to user with our connector, the great thing about the connector is you can use multiple templates, in this case we will create one which will work for both machine and user issued certs.
In Certificate authority, find certificate templates, right click, and select manage. This will bring up the template management pane.

Find the User template in the list, right click and select Duplicate Template. The user template is a default template generated by the installation of ADCS but needs to be modified to meet our needs.
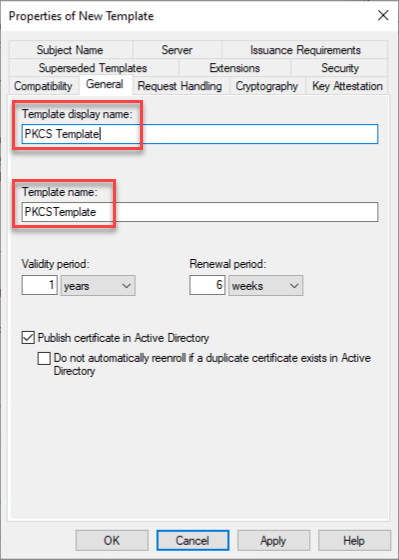
On the Properties of New Template page, click the General tab and change the Template display name to PKCS Template.
On the Compatibility tab, check to see that the Certification Authority is set for Windows Server 2008 R2 and that Certificate Recipient is Windows 7 / Windows Server 2008 R2.

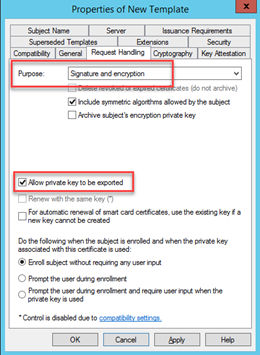
On the Request Handling tab, confirm the Purpose is set to Signature and Encryption and that Allow private key to be exported is selected.
Click on the Cryptography tab and confirm the Minimum key size is set to 2048.

On the Subject Name tab, change to Supply in the request and click OK at the prompt.

Click the Extensions tab and ensure that the Description of Application Policies section includes Encrypting File System, Secure Email and Client Authentication.

Important: If you are planning to deploy certificates to iOS and MacOS, make sure that, in Key Usage, Signature is proof of origin is not selected.

Click the Security tab and grant Read and Enroll permissions to the server where the Intune Connector will be installed click apply and ok.

Close Template management we are done here.
Now we have a template lets publish that template so we can issue certificates against it.
Return to Certificate Authority management, right click Certificate Templates again but this time select New, and Certificate Template to Issue.

We are going to select our new template we just created, in larger enterprises it can take up to 15 min for your template to show as it may need to replicate via AD before it will be available. So you may need to get a cup of coffee or take a short break here..

Once we have selected our certificate and clicked ok, we are done on our ADCD server and can now return to Intune to deploy our connector.
Deploy the Intune PKCS Connector
First open endpoint.microsoft.com, Tenant Administration, Connectors and Tokens, then Certificate connectors.
Select the Add button, and the certificate connector hyper link this will initiate the agent download.


Be sure to right click and Run as administrator. There is a bug if you do not select run as administrator its common to get a configuration error later on.

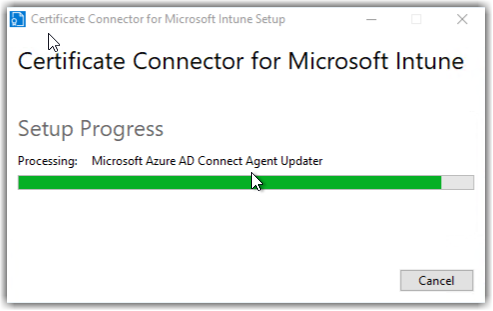
Setup will kick off, and open up to configure.
Select Configure Now..

Click Next to kick off the wizard.

Here you have the option to configure the connector for a number of scenarios. For PKCS we will select both PKCS and Certificate revocation, and next.

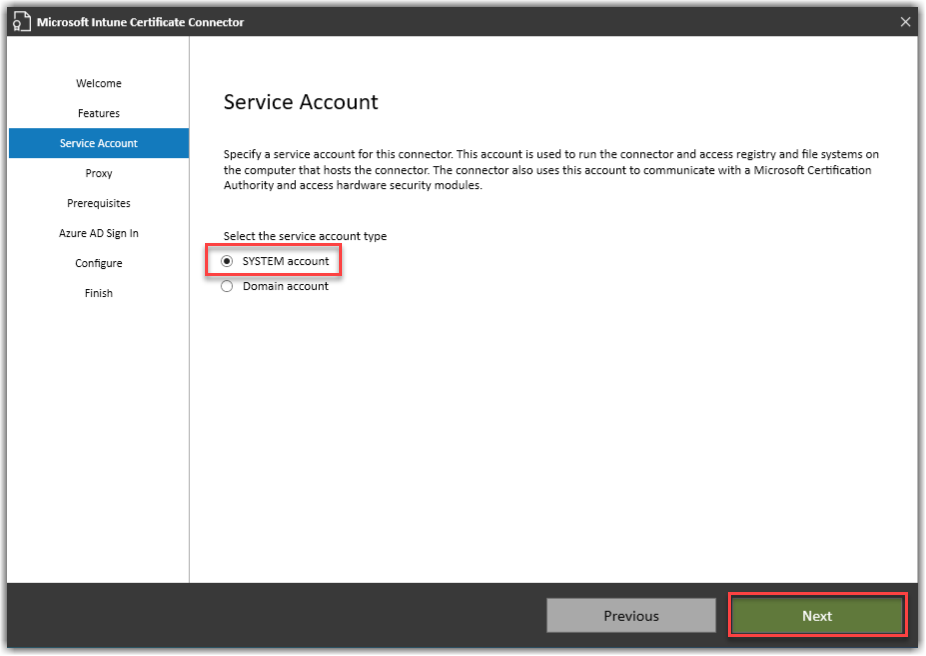
Select SYSTEM account and Next.
On the proxy screen you can just click next here. Keep in mind the Intune connector communicates out using the system account so if your organization is using a proxy you will need to bypass for the computer account not the logged on user.

This screen will validate the local host meets the perquisites. Like domain membership, and OS versions.

Next you will sign into azure to register your connector. This will execute an Azure AD forms page in browser, keep in mind if the form fails check your proxy!

Go ahead and auth!

Once authenticated you should see sign in successful. If you do not check your proxy or your account has the appropriate permissions.

Select next and you should see a confirmation of successful installation.

Head back to endpoint.microsoft.com and check Certificate connectors you should see your connector listed.

I will typically open the connector and provide a friendly name typically the name of the server. Save an validate.

Now you have your template, CA and connector ready to go.. Next we need some certificates.
Prep Root Certificate for on Premise ADCS.
So there are multiple methods to export your trusted root one way is from your ADCS running from a command prompt elevated.
certutil -ca.cert <path and file name ending in .cer>

Another is directly from any domain joined workstation.
Running MMC.exe as admin, you can export y our current Trusted Root and Intermediate. Depending on your CA architecture you may need both especially if your root is offline and your using an issuing CA.

Deploy your Trusted Root and machine/user Certificate
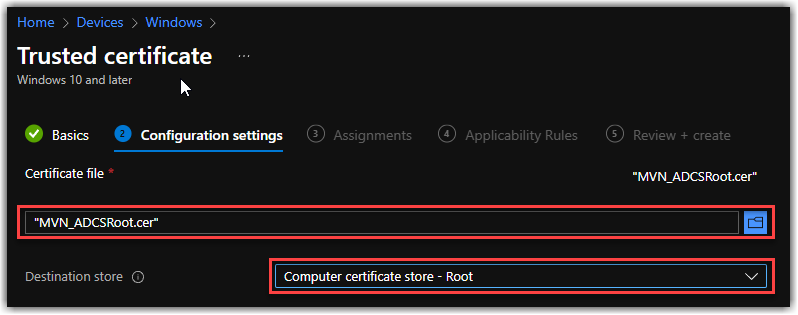
Ok for the easy part, once you have your Trusted root, we are going to deploy that to our clients via Intune using the Intune Trusted Certificate Profile. Be sure you place the Root and Intermediate in the correct Destination store..
Next lets create a PKCS certificate..
Head over to Devices > Configuration profiles > Create Profile > Windows 10 and later > Template > PKCS certificate..
Give your config a name and provide the configurations, as noted below.
Key storage provider (KSP): I typically try to enroll to the TPM but fall back to software in case no TPM is present and we don’t want the cert profile to fail.
Certificate authority: Here you want the fully qualified name of your on premise issuer, this will be the server the agent will reach out to process your certificate request.
Certificate authority name: This is the CA name of your on-premise CA infra. Use the article below for a few options.
Find the name of Enterprise Root CA server - Windows Server | Microsoft Docs
Certificate template name: This is the name of the template you created earlier in your CA, keep in mind these names do not have spaces and are included in the template you created.
Certificate type: Here you can select Device or User depending on targeting, if you need both a user and device simply create a separate template targeting everything but using use target and of course that will require user based Common name and Subject alternative.
If you are looking for additional fields for Common name or Subject alternative the link below are the supported values today.
https://docs.microsoft.com/en-us/mem/intune/protect/certificates-pfx-configure#subject-name-format

Once you save and target the policy you should see both the root in the trusted root, and the device cert in the local machine personal store.

Now you have deployed certs to your devices, the link below is a great place to start for troubleshooting when something goes wrong. I have deployed NDES probably 2 dozen times, and it's extremely common something goes wrong with trusts between CA and NDES.. I've deployed the PKCS connector for the past 9 months and it has worked every time, this was a great feature added to Intune and has dramatically simplified what was once a very complicated process.
Troubleshooting:
There is a great resource on Microsoft docs to help if any troubleshooting is needed.
https://docs.microsoft.com/en-us/troubleshoot/mem/intune/troubleshoot-pkcs-certificate-profiles